Page 1 of 2 12 LastLast
Results 1 to 20 of 37

Thread: A Complete Guide to Nuri's Hallow Campaign!

  1. #1
    Senior Member
    Join Date
    Mar 2011
    Posts
    4,596
    Thanks Thanks Given 
    9
    Thanks Thanks Received 
    638
    Thanked in
    315 Posts

    Exclamation A Complete Guide to Nuri's Hallow Campaign!

    The Complete Guide to Nuri's Hallows!

    By Xwhirlz
    Introduction

    Hello everyone, this is Whirlz.
    After achieving the basic level cap, 60, I have decided to make a guide. Here is the bit of information that I have gathered from my experiences!

    Contents:

    -Introduction
    -Table of Contents
    -Information about Campaign
    +The Story
    -Towne
    +NPCs
    ~Pictures of NPCs
    +New Vanities
    +Level 61 Hardcore Shield- Shield of Hallows, Credit to Ellyidol
    -Dungeons
    +Dungeon: Map Descriptions
    +Bosses
    +Drops
    +XP
    -Top Gear
    +All Pink Drops, Credit to Yanis
    +Sets and Bonuses, Credit to Yanis
    -Quests
    -New Levels and EXP Curves, Credit to asommers
    -Ending


    Information on the Campaign:

    Nuri's Hallow was released on the first week of September 2011, in client 1.7.3. It is the newest campaign, therefore boosting the level cap to 60, (61 for hardcores), and bringing a new free campaign with tons of fun along! It is the first of two promised new dungeons, Nuri's Hallow and the Platinum-only Campain: Mount Fang.
    Nuri's Hallow is for level 55-60, and can be entered by players level 53 and above.

    The Story

    Nuri has a travelling circus that travels the world and performs. But now, the circus has been put under an evil spell and does dark magic and horror. The circus now seeks a brave hero to vanquish evil and restore the popular group of entertainers to what they once were. Will you step up and take the challenge?


    Towne:

    The towne of this new campaign is named Nuri's Hallow and can be entered by any level player. It is a vast dark land similar to Fathom Crypt and has a numerous nunber of NPCs offering services and quests.
    You can access this area by going to the right of Forest Haven Towne.

    NPCs:
    We have many NPCs in this campaign.
    There are NPCs that will give potions, weapons, elixirs, and new vanities that are able to be bought at Harvy.
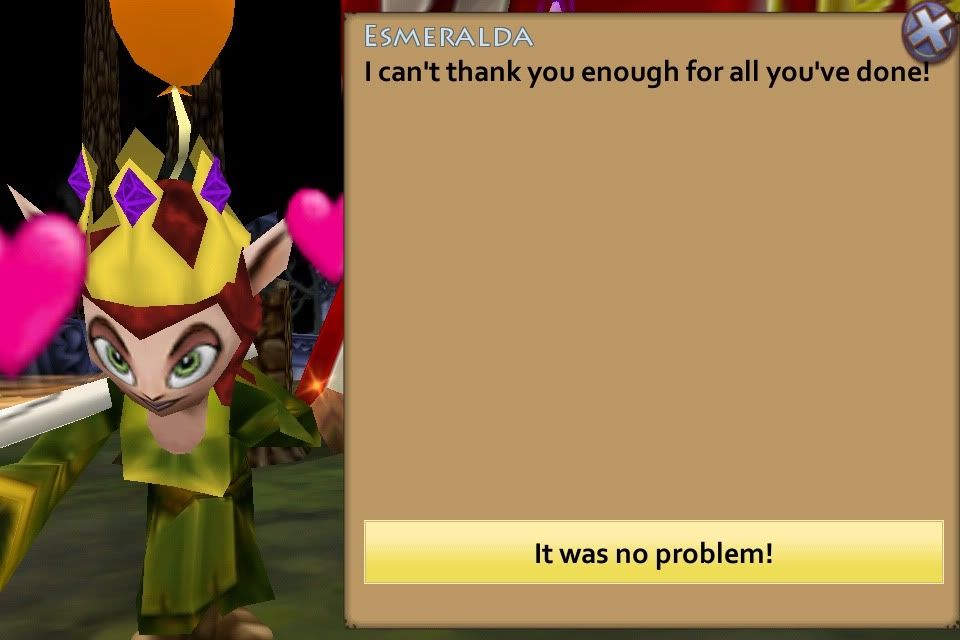
    You will get your main quest line at Esmeralda.

    Some Notable NPCs are listed here:

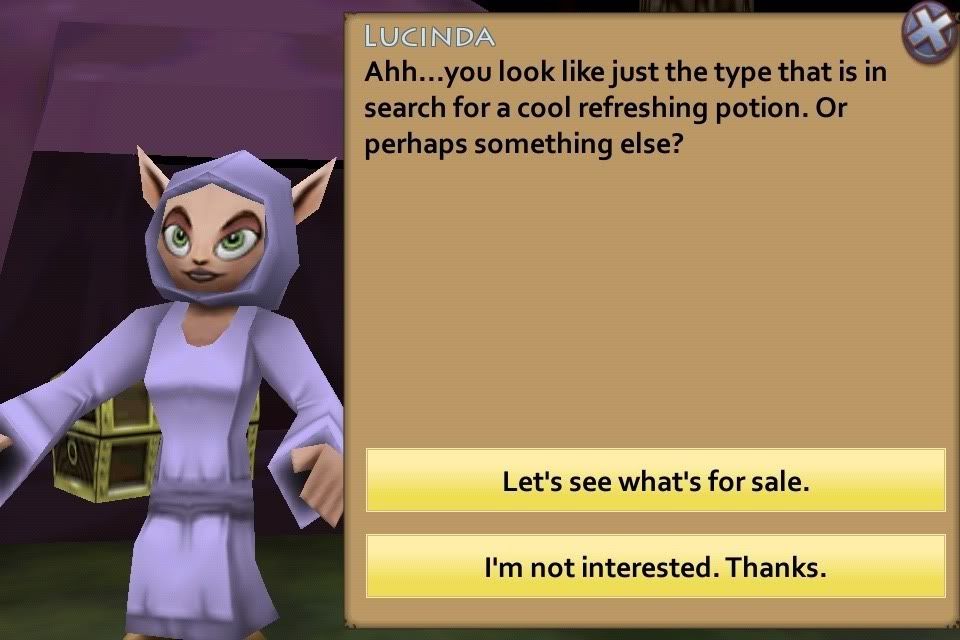
    Lucinda- Provides Magical Weapons/Shields for Beginner Levels, Provides Health and Mana Potions

    Harvy the Haberdasher- Sells all Platinum Store Vanities

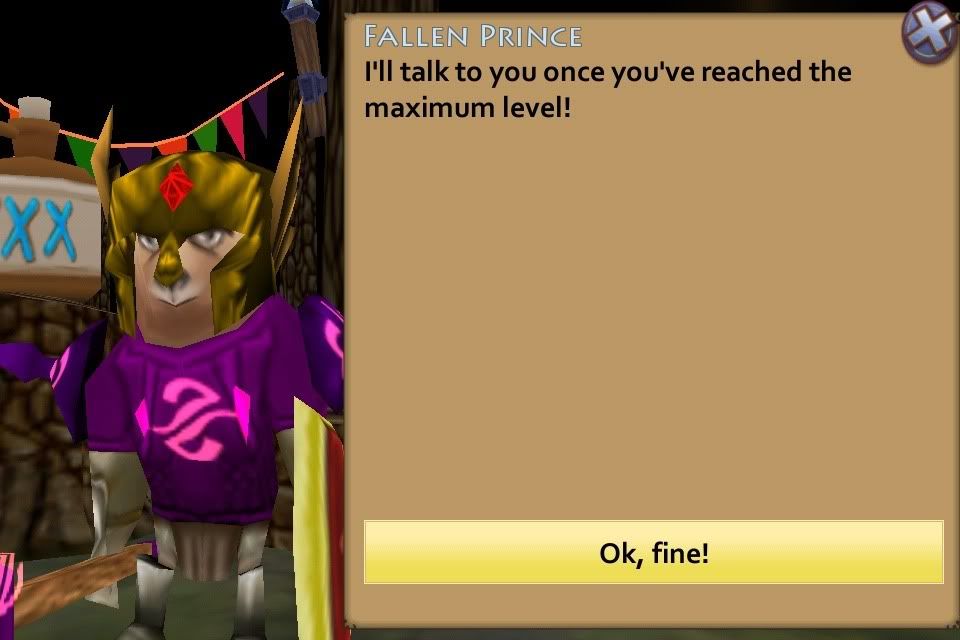
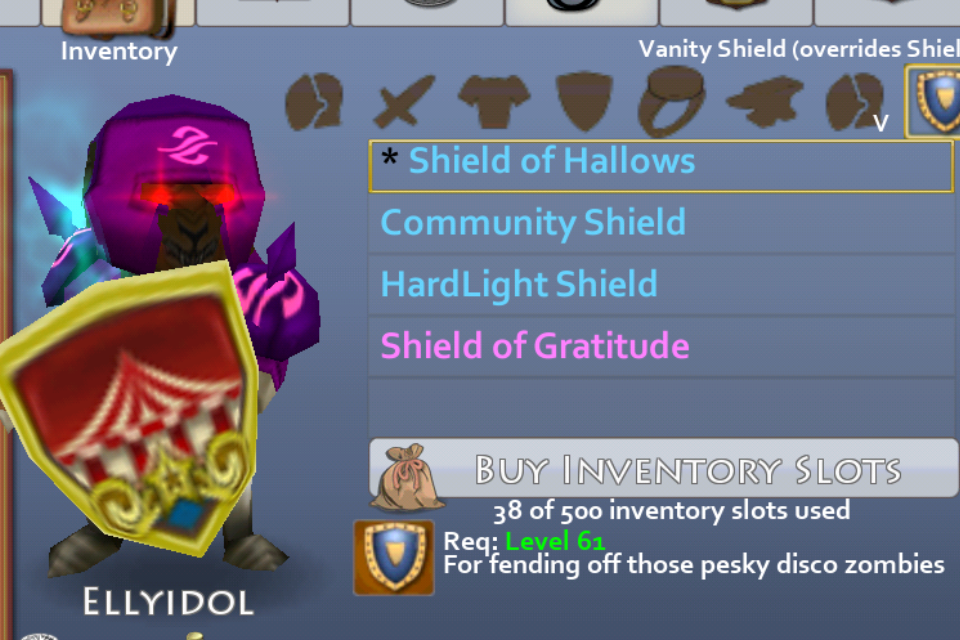
    Fallen Prince- Gives level 61 Shield- Shield of Hallows, when you reach level 61

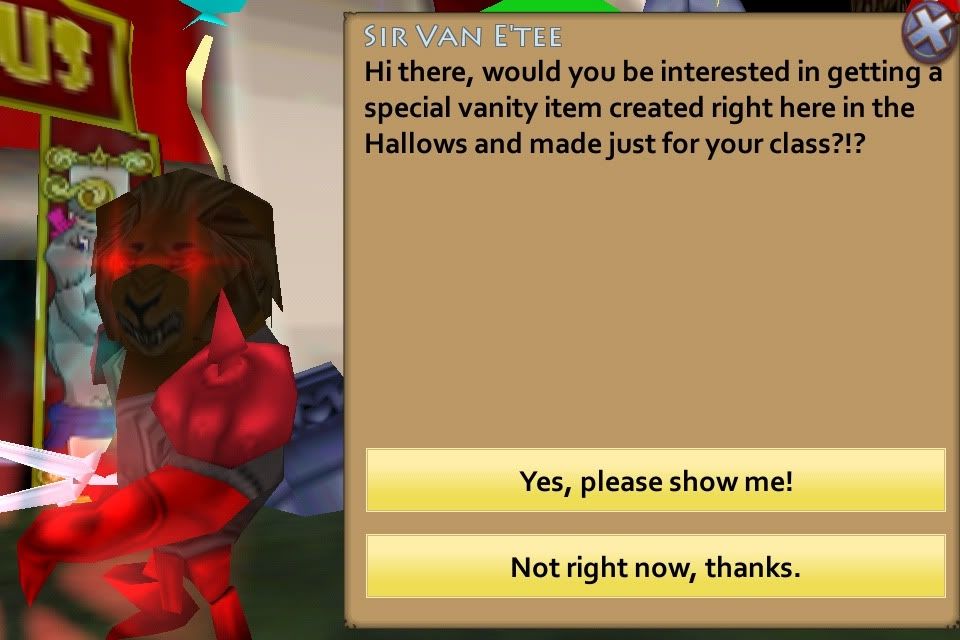
    Sir Van E'tee- Sells New Special Class-Specific Vanities

    Vincent the Vendor- Sells all Platinum and Gold Elixirs

    Valentino- Gives you access to the bonus dungeon: Nuri's Funhouse

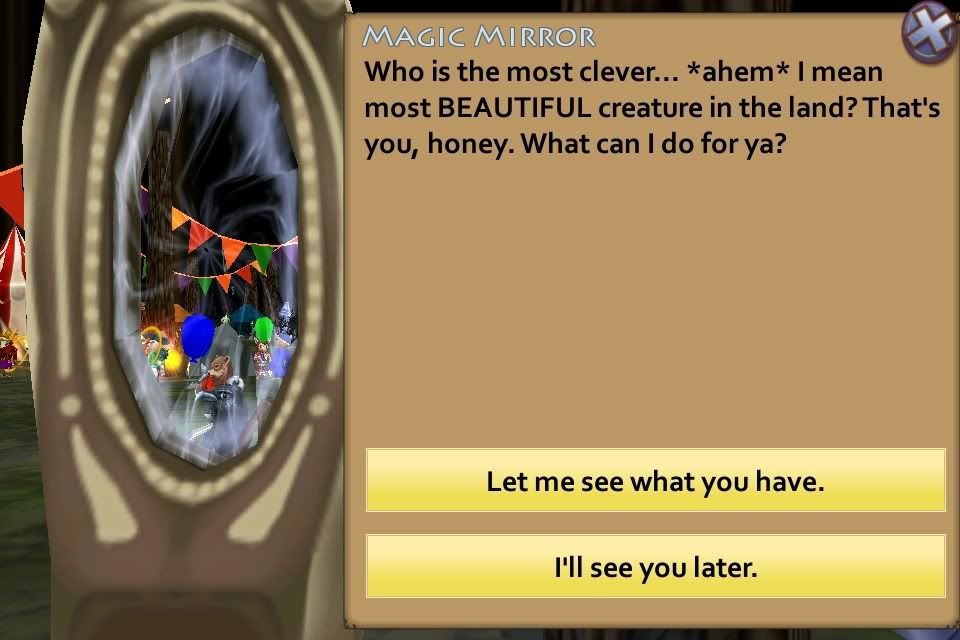
    Magic Mirror- Sells all Platinum Vanity Faces

    Esmeralda- Starts you off with your first quest in the Nuri's Hallows seven-quest chain


    New Vanities:

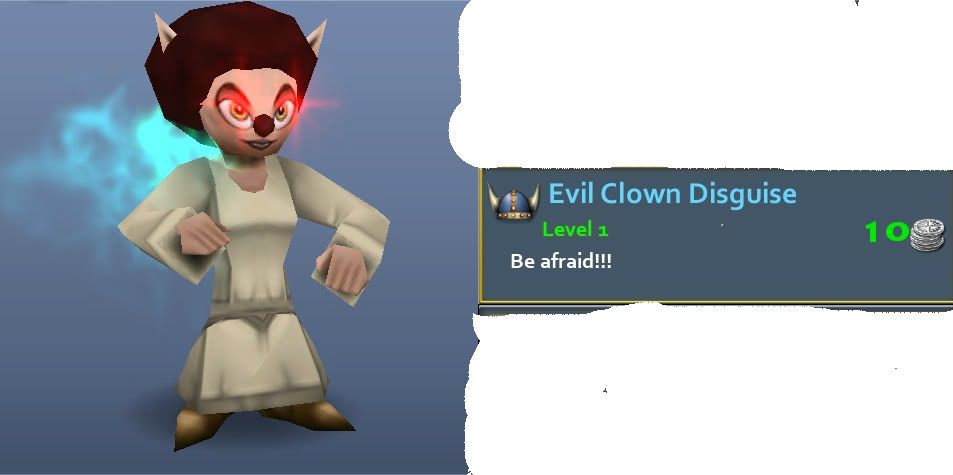
    There are new vanities available at Harvy the Haberdasher:

    There are two for all three classes:
    Clown Disguise- 5Platinum

    Evil Clown Disguise- 10Platinum


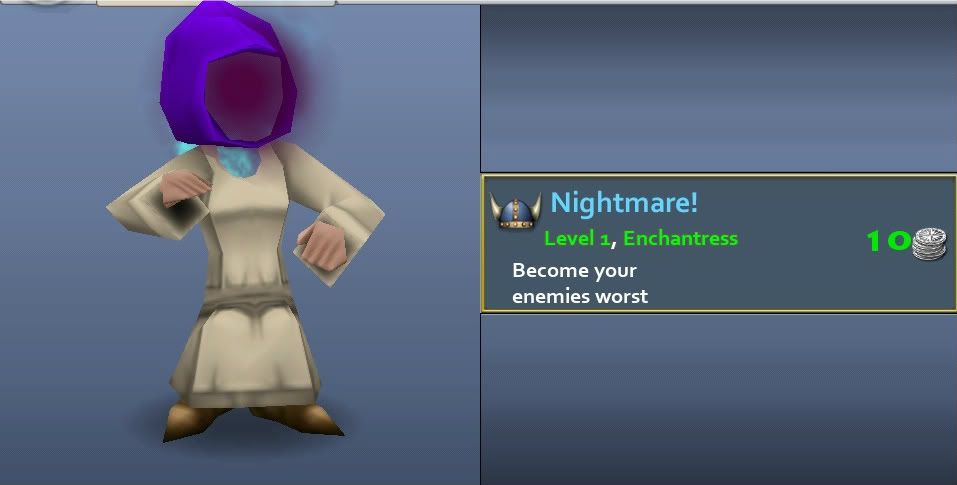
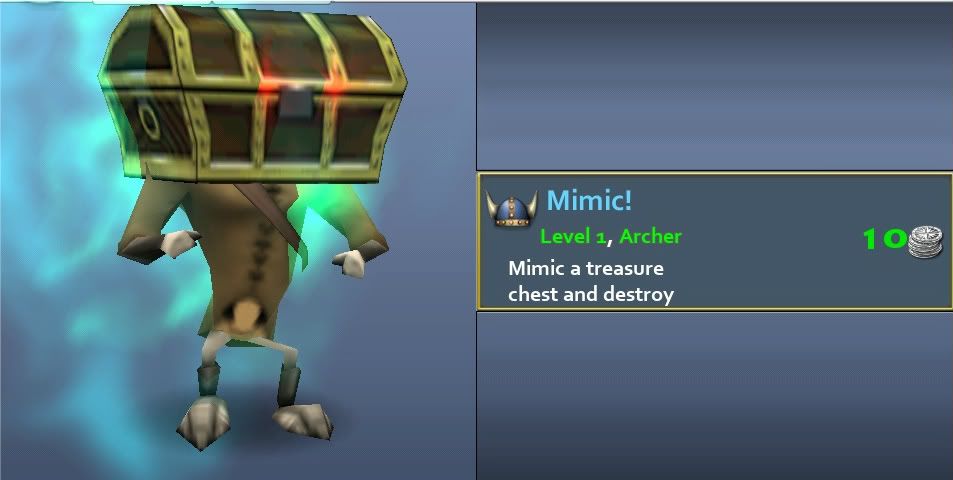
    Now for class-specific ones:

    Enchantress: Nightmare! 10Platinum


    Archer: Mimic! 10Platinum


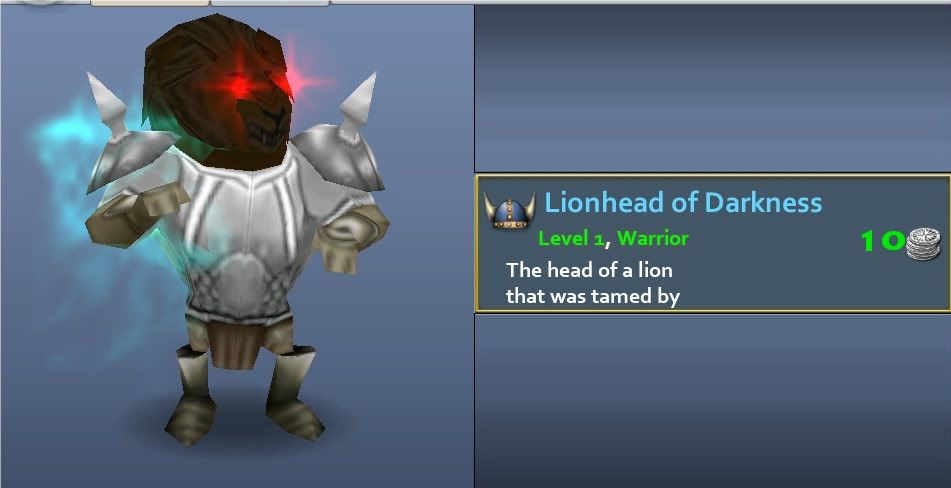
    Warrior: Lionhead of Darkness! 10Platinum


    Level 61 Hardcore Shield- Shield of Hallows
    The level 61 shield is called Shield of Hallows. Unlike the Crown of Persistance, it is a vanity, in blue letters.
    Once you reach level 61, simply go to Fallen Prince in Nuri's Hallows and you will receive it for free.
    The shield has no stats, simply a vanity shield.
    Quote Originally Posted by Ellyidol View Post
    For those that haven't seen it, here:


    To get it, you just speak to the Fallen Prince in the Nuri's Hallows town.
    Dungeons:
    The strategies to defeat the bosses in these dungeons are mainly like Sandstone Cave dungeons.
    In the new free campaign: Nuri's Hallows, there are a total of 5 dungeons and an unlockable 6th bonus dungeon with all the main bosses from the first 5 smushed together.
    All the mini-bosses and bosses have a chance of dropping a pink, a small yet quite frequent drop; 5% would be a good estimate.

    First Five Dungeons:
    The first five dungeons can be unlocked after completing the previous one. You will be able to enter the second dungeon after completing the first one, be able to enter the third one after completing the second and so on.
    The dungeons have barrels/boxes that have a chance to drop a special items available only from these barrels/boxes, including:
    Blood Red Plates: Drops as White/Trash, Green, Purple, or Pink

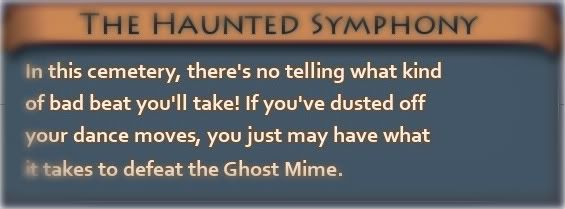
    Dungeon 1: The Haunted Symphony

    Description:
    "In this cemetary, there's no telling what kind of bad beat you'll take! If you've dusted off your dance moves, you just may have what it takes to defeat the Ghost Mime."

    This is the first dungeon and has two bosses; one mini-boss and one main boss.
    Simply clear the whole path to the mini-boss and then move on to the boss. The monsters encountered will be Skeletal Archers, Zombies and Dark Mages. These hit around 200 damage per hit to the average-geared mage and bird.
    It would be good to pot some attack and defense in order to survive. This map is considered to give the most EXP.
    It will give 139 EXP when fully completed (all monsters give 1 EXP each). This is a great map for potting EXP elixirs.

    The mini-boss is Ghost of Music Past, a blueish troll with a white skull.
    He hits hard and has lots of armor and HP, so wail on him hard.
    He can drop a few pinks at a low rate, including:
    Tamer's Scimitar of the Big Top
    Tamer's Bow of Obedience

    The boss, Panto the Mime has a blue orb around it.
    You will have to face two other monsters that separate from him, Panto's Clones. They have lower HP and armor than Panto the Mime, so kill them first.
    Later in the fight, Panto will use his ability which renders you stunned and makes you use the Dance Emote.
    The screen functions disappear and the words, "EVERYBODY DANCE NOW!!" appear at the top left.
    There are rumors saying that you are able to dodge this attack. All in all the trick to defeating Panto the Mime is to first destroy his Clones and then spam him with attacks.

    Panto drops several pinks, including:
    Glyph Helm Pinks
    Melodic Pinks

    In this dungeon, you can get a slow affect or have a negative regeneration rate. Be cautious of this.

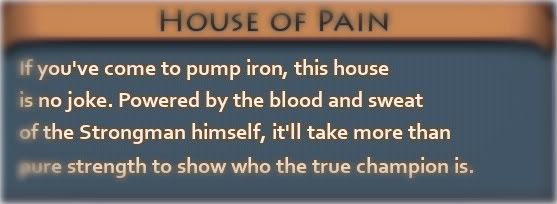
    Dungeon 2: The House of Pain!

    Description:
    "If you've come to pump iron, this house is no joke. Powered by the blood and sweat of the Strongman himself, it'll take more than pure strength to show who the true champion is."

    The second dungeon, unlockable after successfully completing the first, The Haunted Symphony!
    This dungeon is similar to Earthquake's dungeon in Sandstone Cave; Trembling Below the Earth. There will be various weights dropping from the sky and damaging you as well as throwing you across the room every once in a while. Be careful of these, they CAN do critical hits on you! There will be Mages and Bears that are some-what dressed in Halloween-like outfits and some Bewitched Broomsticks. They will do arouns 200 damage to you. This is a decent map for EXP with 76 enemies to kill. There are 3 mini-bosses and 1 boss.
    EXP elixirs are decent with this map.

    Mini-bosses:
    The Grizzlinator-
    This is basically a bigger and more powerful version of the Halloween-Bear. No tactics to beat him, simply dodge the dropping weights and wail down on him. You canget to him by taking the first right in the dungeon, leading you to a tiny enclosed room.
    The Grizzlinator drops a few pinks.

    Hork the Tinier and Wunk the Tiny-
    You face these double-trouble twin bosses at the same time.
    Wunk is easier to kill, so smash him first. Hork has more HP so wait until Wunk dies. They drop some decent pinks loot. Be aware of them both, they can do some heavy damage together.

    The boss is Gustav the Strongman.
    This person is able to one-hit you if he criticals or powers-up. Be aware of falling weights; there are six panels on the floor and once Gustav activates his ability, look for a black hole getting larger on each panel. This hole is the shadow of a soon-to-drop weight. These will fling you across the room hard and do some heavy damage, so AVOID AVOID AVOID as many as you can. They will drop pretty fast.
    Gustav drops several pinks including:
    Glyph Shield Pinks

    There will also be some Chest Mimics that seem like chests but will attack you. Be wary of those in this map.

    Dungeon 3: The Lion's Den

    Description:
    "With claws of fury and cages of steel it will take more than guts to figure out how to subdue the beasts within."

    The third dungeon is called Lion's Den.
    When you enter the dungeon, be sure to press the NPC Death and enter the dungeon.
    If this is the first time in Lion's Den, he will prompt you to do a quest. Just click the three other NPCs and examine them to finish the quest. The dungeon is a short and quick place, with 44 enemies to destroy. There is no dangerous traps except the Fire and Ice Traps. Simply use an AOE attack or SINGLE TARGET attack to kill these or else they will freeze or burn you when you walk over them. There are also a few chest mimics to take caution of. This is not a good place for EXP.
    In this map, we will see People with Guns, Birds with a Dual Wield or Bears with Bone Plates.
    This place is one of the best places in the campaign to farm for drops.
    There is one mini-boss and two bosses in this map.

    The mini-boss is the Zoo Director, basically a more powerful version of the People with Guns.
    He hits a lot so just wail on him. Done.
    Zoo Director drops a few pinks.

    The bosses are Alessandro the Tamer and his Lion.
    The lion is weaker so kill it first, otherwise you'll have a lot of trouble with surviving. The tamer has more HP and armor so spam him with heavy damage.
    The Lion/Tamer can drop many pinks:
    Glyph Armor Pinks
    Tamer's Pinks

    Dungeon 4: Boggy Waters

    Description:
    "It only takes one mis-step to figure out why no one likes to travel through these swamps!"

    The fourth dungeon, a mysterious swamp-like area. You will need to kill 65 monsters to clear this.
    This is a dark and scary dungeon with several traps and tactics needed to survive. First of all, avoid those little groups of holes in the ground. Tall spikes will pop out any second and damage or possibly kill you.
    Be careful, this place is huge and so similar that you can easily get lost!
    There will be mainly Goblins and Crocs here with hypnotized eyes with various colored sparkles.
    This map is okay for EXP but not the best place.
    You want to clear a straight path to the mini-boss and then the boss.
    There is one mini-boss and one main boss.

    The miniboss is Shaman Overlord, he is just like the Zoo Director so just weigh down on him, and avoid those spikes!
    Shaman Overlord can drop pinks.

    The boss requires a similar tactic to beat, somewhat like Magnetic Golem in Sandstone Cave and Gurgox in AO3.
    The boss is Snake Charmer. There are no other tactic to besting him other than to avoid his party wipe attack and to avoid the spikes.
    Snake Charmer has low HP and armor for a boss and should fall quick if you avoid his one-shot moves:
    Here's how it works:
    In the middle of the fight, Snake Charmer will send out a grayish-white wave. If you get hit by it, you will see stones attached to your character's feet and your movement speed will be greatly reduced. If however you avoid this attack by running behind one of the several stone pillars surrounding the area, you will be safe from the upcoming one-shot ability.
    A few moments after the first wave, a second red wave will sweep from Snake Charmer. If you did not get hit by the first wave, which means you don't have stone feet, the second wave has no effect on you.
    If you however did get hit by the first wave, run behind a stone pillar to get so that it is blocking a path from the boss to you. If you are not fast enough, you will be one-shotted and die. Be careful, the stone feet effect dramatically slows down your movement speed.
    Snake Charmer gives a decent amount of loot, including:
    All pinks from the "Reptilian" Pinks Set
    1-handed Glyph Pinks
    Reptilian Pinks

    Dungeon 5: Nuri's Madness

    Description:
    "There's no telling what sort of dust and old memories one will be dug up in here! Be sure to watch out!"

    Upon advancing to the next level, you will enter an even darker area: Nuri the Gypsy Queen's Mind!
    You will get hit by a fast HP drain effect once in a while and you will need to go and find an Obelisk of Light in order to cure yourself from this illness. If you cannot find one, go near an unawakened pillar and press it. It will start activating the pillar. However you must not be hit by a monster's attack or you will have to re-activate the pillar.
    Many people simply run this for loot, which comes from the boss at the end. This boss is the final boss of this campaign and is called Nuri the Gypsy Queen, a fat woman. To get her to spawn at the end, you must first activate ALL the Obelisks of Light in the map. There will only be 1 enemy remaining, however various other Enemies of Darkness will spawn and damage you. Some are skulls with swords and shields, some with a staff and some big fat darkness golems similar to the Ghost of Music Past.
    Just pot a Tanker's Ale Elixir (raises armor)or any other armor elixir along with a Movement Speed Elixir(optional) to get past these monsters. Healing, roots, ice attacks, iron blood, evasion, mana shield and blessings are vital to surviving the path to the boss.
    Don't think about potting EXP elixirs here, there is nothing to gain.
    There is one boss: Nuri the Gypsy Queen.
    She has a few Mirror O' Souls surrounding her, and they will activate with a boom once in a while and glow green.
    Go deactivate the mirrors the same way you deactivated the Obelisks of Light. You have to go behind the mirror and turn of Auto Attack to be able to do this and avoid attacks from Nuri. Once successfully defeated, Nuri will drop a few pinks, including:
    2-handed Glyph Pinks

    Bonus Dungeon 6: Nuri's Funhouse

    Description:
    "Loaded with danger around every corner! This funhouse is anything but a leisurely stroll! Watch your step and prove your worth!"

    This dungeon is unlockable after you complete all 7 quests available for the main quest arc, started by Esmeralda. Go to Valentino to get a "VIP ticket" and enter the mini-dungeon. This dungeon drops the pinks available from the first five dungeons and contains all the main bosses from the first five dungeons. There are 53 enemies, including monsters from the various five dungeons and bosses.
    Don't pot EXP here, just a waste of money.
    This place is rumored to drop all pinks from Nuri's Hallows, but with a lower drop rate than the first 5, and is one of the best places to farm for drops.

    Top Gear

    With the new expansion, there must be new gear.
    The common loot is just a repeat of the AO3 items, with a different subtitle. The top gear is called "Glyph" items. These are the "rarest" drops from the dungeons and form three level 56, 58, and 60 sets(one for each class) that emit purple sparkles.


    Pink Drops
    Note: Pinks can drop as level 56, 58, or 60.
    Thanks to Yanis for a list of the newest pinks available for you!

    Quote Originally Posted by Yanis View Post


    NURI'S HALLOWS

    Premium Pinks (Glyph items. These drop from main bosses on all levels.)
    Glyph Armor of Mimicry Req: Level 60, 140 Dex 21 Dex, 6% Hit, 5% Crit, 5 H/s, 5 M/s, 7 Damage, 58 Armor Levels: 56, 58, 60
    Glyph Armor of Obedience Req: Level 60, 140 Dex 20 Dex, 5% Hit, 6% Crit, 5 H/s, 5 M/s, 8 Damage, 58 Armor Levels: 56, 58, 60
    Glyph Helmet of Mimicry Req: Level 60, 140 Dex 21 Dex, 6% Hit, 5% Crit, 5 H/s, 5 M/s, 7 Damage, 32 Armor Levels: 56, 58, 60
    Glyph Helmet of Obedience Req: Level 60, 140 Dex 20 Dex, 5% Hit, 6% Crit, 5 H/s, 5 M/s, 8 Damage, 32 Armor Levels: 56, 58, 60
    Glyph Wing of Mimicry Req: Level 60, 140 Dex 21 Dex, 6% Hit, 5% Crit, 5 H/s, 5 M/s, 7 Damage, 40 Armor Levels: 56, 58, 60
    Glyph Wing of Obedience Req: Level 60, 140 Dex 20 Dex, 5% Hit, 6% Crit, 5 H/s, 5 M/s, 8 Damage, 40 Armor Levels: 56, 58, 60
    Glyph Auto-Crossbow of Mimicry Req: Level 60, 140 Dex 155-167 Damage, 0.8 Speed, 21 Dex, 6% Hit, 5% Crit, 5 H/s, 5 M/s, 4 Armor Levels: 56, 58, 60
    Glyph Auto-Crossbow of Obedience Req: Level 60, 140 Dex 156-168 Damage, 0.8 Speed, 20 Dex, 5% Hit, 6% Crit, 5 H/s, 5 M/s, 4 Armor Levels: 56, 58, 60
    Glyph Dagger of Mimicry Req: Level 60, 140 Dex 102-105 Damage, 0.4 Speed, 21 Dex, 6% Hit, 5% Crit, 5 H/s, 5 M/s, 4 Armor Levels: 56, 58, 60
    Glyph Dagger of Obedience Req: Level 60, 140 Dex 103-106 Damage, 0.8 Speed, 20 Dex, 5% Hit, 6% Crit, 5 H/s, 5 M/s Levels: 56, 58, 60
    Glyph Cloth of Charmin' Req: Level 60, 140 Int 20 Int, 5% Crit, 5 H/s, 5 M/s, 9 Damage, 63 Armor Levels: 56, 58, 60
    Nuri's Glyph Cloth Req: Level 60, 140 Int 22 Int, 5% Crit, 5 H/s, 5 M/s, 8 Damage, 62 Armor Levels: 56, 58, 60
    Glyph Hood of Charmin' Req: Level 60, 140 Int 20 Int, 5% Crit, 5 H/s, 5 M/s, 9 Damage, 33 Armor Levels: 56, 58, 60
    Nuri's Glyph Hood Req: Level 60, 140 Int 22 Int, 5% Crit, 5 H/s, 5 M/s, 8 Damage, 33 Armor Levels: 56, 58, 60
    Glyph Bracer of Charmin' Req: Level 60, 140 Int 20 Int, 5% Crit, 5 H/s, 5 M/s, 9 Damage, 40 Armor Levels: 56, 58, 60
    Nuri's Glyph Bracer Req: Level 60, 140 Int 22 Int, 5% Crit, 5 H/s, 5 M/s, 8 Damage, 39 Armor Levels: 56, 58, 60
    Nuri's Glyph Wand Req: Level 60, 140 Int 124-169 Damage, 1.0 Speed, 20 Int, 5% Crit, 5 H/s, 5 M/s, 8 Armor Levels: 56, 58, 60
    Glyph Wand of Charmin' Req: Level 60, 140 Int 125-170 Damage, 1.0 Speed, 20 Int, 5% Crit, 5 H/s, 5 M/s, 9 Armor Levels: 56, 58, 60
    Glyph Staff of Charmin' Req: Level 60, 140 Int 175-198 Damage, 1.1 Speed, 20 Int, 5% Crit, 5 H/s, 5 M/s, 9 Armor Levels: 56, 58, 60
    Nuri's Glyph Staff Req: Level 60, 140 Int 174-197 Damage, 1.1 Speed, 22 Int, 5% Crit, 5 H/s, 5 M/s, 8 Armor Levels: 56, 58, 60
    Glyph Platemail of the Big Top Req: Level 60, 140 Str 22 Str, 6% Dodge, 3% Hit, 5 H/s, 5 M/s, 5 Damage, 62 Armor Levels: 56, 58, 60
    Strongman's Glyph Platemail Req: Level 60, 140 Str 20 Str, 5% Dodge, 5 H/s, 5 M/s, 9 Damage, 64 Armor Levels: 56, 58, 60
    Glyph Plate Helmet of the Big Top Req: Level 60, 140 Str 22 Str, 6% Dodge, 5% Hit, 5 H/s, 5 M/s, 5 Damage, 39 Armor Levels: 56, 58, 60
    Strongman's Glyph Plate Helmet Req: Level 60, 140 Str 20 Str, 5% Dodge, 5 H/s, 5 M/s, 9 Damage, 41 Armor Levels: 56, 58, 60
    Glyph Shield of the Big Top Req: Level 60, 140 Str 22 Str, 6% Dodge, 3% Hit, 5 H/s, 5 M/s, 5 Damage, 49 Armor Levels: 56, 58, 60
    Strongman's Glyph Shield Req: Level 60, 140 Str 20 Str, 5% Dodge, 5 H/s, 5 M/s, 9 Damage, 51 Armor Levels: 56, 58, 60
    Glyph Battle Sword of the Big Top Req: Level 60, 140 Str 217-269 Damage, 1.3 Speed, 22 Str, 6% Dodge, 3% Hit, 5 H/s, 5 M/s, 7 Armor Levels: 56, 58, 60
    Glyph Mace of the Big Top Req: Level 60, 140 Str 194-269 Damage, 1.4 Speed, 22 Str, 6% Dodge, 3% Hit, 5 H/s, 5 M/s, 7 Armor Levels: 56, 58, 60
    Strongman's Glyph Battle Sword Req: Level 60, 140 Str 221-273 Damage, 1.3 Speed, 20 Str, 5% Dodge, 5 H/s, 5 M/s, 9 Armor Levels: 56, 58, 60
    Strongman's Glyph Mace Req: Level 60, 140 Str 198-273 Damage, 1.4 Speed, 20 Str, 5% Dodge, 5 H/s, 5 M/s, 9 Armor Levels: 56, 58, 60

    Common Pinks (These drop from main bosses and mini bosses on all levels.)
    Melodic Cap of Mimicry Req: Level 60, 140 Dex 21 Dex, 6% Hit, 5% Crit, 5 H/s, 5 M/s, 7 Damage, 27 Armor Levels: 56, 58, 60
    Melodic Cap of Obedience Req: Level 60, 140 Dex 20 Dex, 5% Hit, 6% Crit, 5 H/s, 5 M/s, 8 Damage, 27 Armor Levels: 56, 58, 60
    Mime's Glove of Mimicry Req: Level 60, 134 Dex 21 Dex, 6% Hit, 5% Crit, 5 H/s, 5 M/s, 7 Damage, 33 Armor Levels: 56, 58, 60
    Mime's Glove of Obedience Req: Level 60, 134 Dex 20 Dex, 5% Hit, 6% Crit, 5 H/s, 5 M/s, 8 Damage, 33 Armor Levels: 56, 58, 60
    Tamer's Bracer of Mimicry Req: Level 60, 140 Dex 21 Dex, 6% Hit, 5% Crit, 5 H/s, 5 M/s, 7 Damage, 40 Armor Levels: 56, 58, 60
    Tamer's Bracer of Obedience Req: Level 60, 134 Dex 20 Dex, 5% Hit, 6% Crit, 5 H/s, 5 M/s, 8 Damage, 38 Armor Levels: 56, 58, 60
    Melodic Auto-Crossbow of Mimicry Req: Level 60, 140 Dex 171-216 Damage, 1.0 Speed, 21 Dex, 6% Hit, 5% Crit, 5 H/s, 5 M/s, 4 Armor Levels: 56, 58, 60
    Melodic Auto-Crossbow of Obedience Req: Level 60, 140 Dex 172-217 Damage, 1.0 Speed, 20 Dex, 5% Hit, 6% Crit, 5 H/s, 5 M/s, 4 Armor Levels: 56, 58, 60
    Reptilian Dagger of Mimicry Req: Level 60, 140 Dex 99-102 Damage, 0.4 Speed, 22 Dex, 6% Hit, 5% Crit, 5 H/s, 5 M/s, 4 Armor Levels: 56, 58, 60
    Reptilian Dagger of Obedience Req: Level 60, 140 Dex 100-103 Damage, 0.4 Speed, 20 Dex, 5% Hit, 6% Crit, 5 H/s, 5 M/s, 4 Armor Levels: 56, 58, 60
    Tamer's Blunderbuss of Mimicry Req: Level 60, 140 Dex 146-156 Damage, 0.7 Speed, 21 Dex, 6% Hit, 5% Crit, 5 H/s, 5 M/s, 4 Armor Levels: 56, 58, 60
    Tamer's Blunderbuss of Obedience Req: Level 60, 140 Dex 147-157 Damage, 0.7 Speed, 20 Dex, 5% Hit, 6% Crit, 5 H/s, 5 M/s, 4 Armor Levels: 56, 58, 60
    Tamer's Bow of Mimicry Req: Level 60, 140 Dex 164-209 Damage, 0.9 Speed, 21 Dex, 6% Hit, 5% Crit, 7 H/s, 7 M/s, 4 Armor Levels: 56, 58, 60
    Tamer's Bow of Obedience Req: Level 60, 140 Dex 165-210 Damage, 0.9 Speed, 20 Dex, 5% Hit, 6% Crit, 5 H/s, 5 M/s, 4 Armor Levels: 56, 58, 60
    Nuri's Imhotep Eye Req: Level 60, 183 Int 22 Int, 5% Crit, 5 H/s, 5 M/s, 8 Damage, 40 Armor Levels: 56, 58, 60
    Imhotep Eye of Charmin' Req: Level 60, 183 Int 20 Int, 5% Crit, 5 H/s, 5 M/s, 9 Damage, 41 Armor Levels: 56, 58, 60
    Nuri's Strongman's Wristband Req: Level 60, 140 Int 22 Int, 5% Crit, 5 H/s, 5 M/s, 8 Damage, 33 Armor Levels: 56, 58, 60
    Strongman's Wristband of Charmin' Req: Level 60, 140 Int 20 Int, 5% Crit, 5 H/s, 5 M/s, 9 Damage, 34 Armor Levels: 56, 58, 60
    Maestro's Baton of Charmin' Req: Level 60, 140 Int 124-159 Damage, 1.0 Speed, 20 Int, 5% Crit, 5 H/s, 5 M/s, 9 Armor Levels: 56, 58, 60
    Nuri's Maestro's Baton Req: Level 60, 140 Int 123-158 Damage, 1.0 Speed, 22 Int, 5% Crit, 5 H/s, 5 M/s, 8 Armor Levels: 56, 58, 60
    Nuri's Reptilian Staff Req: Level 60, 140 Int 174-212 Damage, 1.1 Speed, 22 Int, 5% Crit, 5 H/s, 5 M/s, 8 Armor Levels: 56, 58, 60
    Reptilian Staff of Charmin' Req: Level 60, 140 Int 175-213 Damage, 1.1 Speed, 20 Int, 5% Crit, 5 H/s, 5 M/s, 9 Armor Levels: 56, 58, 60
    Strongman's Reptilian Helmet Req: Level 60, 140 Str 20 Str, 5% Dodge, 5 H/s, 5 M/s, 9 Damage, 35 Armor Levels: 56, 58, 60
    Reptilian Helmet of the Big Top Req: Level 60, 140 Str 22 Str, 6% Dodge, 3% Hit, 5 H/s, 5 M/s, 5 Damage, 33 Armor Levels: 56, 58, 60
    Reptilian Shield of the Big Top Req: Level 60, 140 Str 22 Str, 6% Dodge, 3% Hit, 5 H/s, 5 M/s, 5 Damage, 43 Armor Levels: 56, 58, 60
    Strongman's Reptilian Shield Req: Level 60, 140 Str 20 Str, 5% Dodge, 5 H/s, 5 M/s, 9 Damage, 45 Armor Levels: 56, 58, 60
    Strongman's Mallet of the Big Top Req: Level 60, 140 Str 179-209 Damage, 1.0 Speed, 22 Str, 6% Dodge, 3% Hit, 5 H/s, 5 M/s, 7 Armor Levels: 56, 58, 60
    Strongman's Strongman's Mallet Req: Level 60, 140 Str 183-213 Damage, 1.0 Speed, 20 Str, 5% Dodge, 5 H/s, 5 M/s, 9 Armor Levels: 56, 58, 60
    Strongman's Tamer's Scimitar Req: Level 60, 140 Str 131-138 Damage, 1.0 Speed, 20 Str, 5% Dodge, 5 H/s, 5 M/s, 9 Armor Levels: 56, 58, 60
    Strongman's Tamin' Club Req: Level 60, 140 Str 161-180 Damage, 0.7 Speed, 20 Str, 5% Dodge, 5 H/s, 5 M/s, 9 Armor Levels: 56, 58, 60
    Tamer's Scimitar of the Big Top Req: Level 60, 140 Str 127-134 Damage, 1.0 Speed, 22 Str, 6% Dodge, 3% Hit, 5 H/s, 5 M/s, 7 Armor Levels: 56, 58, 60
    Tamin' Club of the Big Top Req: Level 60, 140 Str 127-134 Damage, 0.7 Speed, 22 Str, 6% Dodge, 3% Hit, 5 H/s, 5 M/s, 7 Armor Levels: 56, 58, 60


    Sets and Bonuses
    There are new sets for Nuri's Hallows Campaign: Glyph Sets.
    These sets can be made at level 56, 58, and 60 and emit a purple sparkle when fully equipped.
    Quote Originally Posted by Yanis
    Archer->Glyph Obedience Autobow Set Glyph Helmet of Obedience, Glyph Armor of Obedience, Glyph Auto-Crossbow of Obedience+4 Crit, +6 H/s, +6 Damage
    Archer->Glyph Obedience Dagger Set Glyph Helmet of Obedience, Glyph Armor of Obedience, Glyph Dagger of Obedience, Glyph Wing of Obedience+4 Dodge, +6 H/s, +6 Armor
    Enchantress->Glyph Charmin' Staff Set Glyph Hood of Charmin', Glyph Cloth of Charmin', Glyph Staff of Charmin'+2 Hit, +4 Crit, +6 H/s, +8 Damage
    Enchantress->Glyph Charmin' Wand Set Glyph Hood of Charmin', Glyph Cloth of Charmin', Glyph Wand of Charmin', Glyph Bracer of Charmin'+4 Dodge, +6 H/s, +6 Armor
    Warrior->Glyph Strongman Battle Sword Set Strongman's Glyph Platemail, Strongman's Glyph Plate Helmet, Strongman's Glyph Battle Sword+4 Crit +4 H/s, +4 Damage
    Warrior->Glyph Strongman Mace Set Strongman's Glyph Platemail, Strongman's Glyph Plate Helmet, Strongman's Glyph Mace, Strongman's Glyph Shield+6 H/s, +6 Armor
    Quests
    -Under Process-
    With the new expansion, we have 7 new quests to look forward to and a new full completion number of 165/165!

    Go to Esmeralda to begin the quest chain.

    The first quest is Disco Fever.
    Go and defeat Panto to complete this.
    The next six quests will ask you to mainly defeat bosses and restore the state of Nuri's Hallows.
    Upon finishing the last quest, you now have access to Nuri's Funhouse, the sixth, last, and bonus dungeon to this campaign.

    Quests: 7/7
    Quest 1/7-
    Name:
    Given By/Complete At:
    Description:
    Objective/Tips:
    Quest Rewards:

    New Levels and EXP Curves

    Now that new levels are here, the EXP curves have been given by asommers!
    Quote Originally Posted by asommers
    The level 56 advancement curve was discussed here. For those that want to know the advancement curve for level 61, here it is.

    -ALS

    Level and XP required to get to the next level
    1 - 8
    2 - 16
    3 - 42
    4 - 68
    5 - 94
    6 - 120
    7 - 146
    8 - 172
    9 - 198
    10 - 224
    11 - 250
    12 - 276
    13 - 302
    14 - 328
    15 - 354
    16 - 380
    17 - 406
    18 - 432
    19 - 458
    20 - 490
    21 - 524
    22 - 561
    23 - 600
    24 - 642
    25 - 687
    26 - 735
    27 - 786
    28 - 841
    29 - 904
    30 - 972
    31 - 1045
    32 - 1123
    33 - 1207
    34 - 1298
    35 - 1395
    36 - 1500
    37 - 1613
    38 - 1734
    39 - 1873
    40 - 2023
    41 - 2185
    42 - 2360
    43 - 2549
    44 - 2753
    45 - 2973
    46 - 3211
    47 - 3468
    48 - 3745
    49 - 4063
    50 - 4408
    51 - 4783
    52 - 5190
    53 - 5631
    54 - 6110
    55 - 6629
    56 - 7192
    57 - 7803
    58 - 8466
    59 - 9228
    60 - 100590
    61 - cap
    The original thread link can be found here.

    Ending

    Now that I have poured my knowledge into this thread, I hope you will understand the new complicated and fascinating campaign Spacetime Studios has released for us.
    I hope this will help you farm, level up faster, look forward to reaching level cap, and enjoy and go to the full extent of this new area released!
    Feel free to rep me if this was helpful.
    -Whirlzap
    Last edited by Whirlzap; 07-31-2013 at 02:53 PM. Reason: Updated everything except quests!

  2. The Following 4 Users Say Thank You to Whirlzap For This Useful Post:


  3. #2
    Senior Member
    Join Date
    Mar 2011
    Posts
    4,596
    Thanks Thanks Given 
    9
    Thanks Thanks Received 
    638
    Thanked in
    315 Posts

    Default

    Reserved for future stuff

  4. #3
    Senior Member
    Join Date
    Aug 2011
    Posts
    1,498
    Thanks Thanks Given 
    61
    Thanks Thanks Received 
    47
    Thanked in
    41 Posts

    Default

    GRRRRRRRRRRRRRRRRRRRRRRRREAT!*imagine me saying that like the tiger from the Frost Flakes commercial*

  5. #4
    Guardian of Alterra Siejo's Avatar
    Join Date
    Dec 2010
    Location
    Tacoma, WA
    Posts
    868
    Thanks Thanks Given 
    139
    Thanks Thanks Received 
    160
    Thanked in
    85 Posts

    Default

    Great info. You should pm the devs and ask if they can sticky this in the guide section with the rest of the guides.

  6. #5
    Senior Member bronislav84's Avatar
    Join Date
    Dec 2010
    Location
    Brooklyn, NY, USA
    Posts
    1,935
    Thanks Thanks Given 
    74
    Thanks Thanks Received 
    71
    Thanked in
    54 Posts

    Default

    Quote Originally Posted by Siejo:403580
    Great info. You should pm the devs and ask if they can sticky this in the guide section with the rest of the guides.
    What he said. I agree with this completely.

    AL Kar | PL/SL Karaai | DL/AL Karai | SL Karaii | AL Karwar | PL Squishybirdie | PL Gotnorange

  7. #6
    Forum Adept Bakoffmycandy's Avatar
    Join Date
    Jul 2011
    Location
    Alaska, Left the heat on & melted my Igloo...
    Posts
    426
    Thanks Thanks Given 
    19
    Thanks Thanks Received 
    15
    Thanked in
    10 Posts

    Default

    Great post, kudos!
    Proud Officer of Infinite Union
    Downloads -36 Commando * Http -36 Operative * URL -36 Engineer

  8. #7
    The Doppelgänger WoundedEagle's Avatar
    Join Date
    Mar 2011
    Location
    idk
    Posts
    3,750
    Thanks Thanks Given 
    914
    Thanks Thanks Received 
    477
    Thanked in
    316 Posts

    Default

    Good Job. Now every other campaign

  9. #8
    Banned
    Join Date
    Aug 2011
    Posts
    7,475
    Thanks Thanks Given 
    263
    Thanks Thanks Received 
    431
    Thanked in
    299 Posts

    Default

    There is no list of thhe quests

  10. #9
    Forum Adept NoobianOfAlterra's Avatar
    Join Date
    Jun 2011
    Posts
    401
    Thanks Thanks Given 
    62
    Thanks Thanks Received 
    24
    Thanked in
    16 Posts

    Default

    I can confirm dodging panto's dance effect, though I was too shocked and busy spamming skills to take a screenie , I dodged it in Nuri's funhouse so maybe you can only dodge it there? I'll do some testing

  11. #10
    Senior Member
    Join Date
    Mar 2011
    Posts
    4,596
    Thanks Thanks Given 
    9
    Thanks Thanks Received 
    638
    Thanked in
    315 Posts

    Default

    It is possible to dodge Panto's Dancing attack.
    I can confirm that however I need to know if it is a glitch or a bug that has not been fixed first before posting a confirmation.
    @Lwmark: Working on that, if anyone could give me a quest and the description it would be helpful to me and to Ayrilana, I'm sure.

  12. #11
    Senior Member Redbridge's Avatar
    Join Date
    Jan 2011
    Location
    Cully
    Posts
    1,793
    Thanks Thanks Given 
    206
    Thanks Thanks Received 
    104
    Thanked in
    63 Posts

    Default

    Cheers for the Snake Charmer tip... Nice to know you only need to doge the first grey/white blast ring.

    Sweet..
    Use the SEARCH function or it'll probably be here--> PL stuff or SL stuff >>> I'm 'SRINGY 2' .
    ** Elf/Redbridge - Ursan/Scorpionious - Avian/Bolticus ** Eng/Redbridge - Op/Yoda **
    I am responisble for what I say. I am not responsible for what you understand

  13. #12
    Senior Member
    Join Date
    Mar 2011
    Posts
    4,596
    Thanks Thanks Given 
    9
    Thanks Thanks Received 
    638
    Thanked in
    315 Posts

    Default

    Yeah I found out that trick when people started calling me Haxer when I didnt die from the red wave.

  14. #13
    Member KhaosAngel's Avatar
    Join Date
    Jun 2011
    Location
    Maine USA
    Posts
    246
    Thanks Thanks Given 
    6
    Thanks Thanks Received 
    9
    Thanked in
    6 Posts

    Default

    *Clapping*

  15. #14
    Senior Member Ayc2000's Avatar
    Join Date
    Apr 2011
    Location
    gone xP
    Posts
    2,549
    Thanks Thanks Given 
    92
    Thanks Thanks Received 
    56
    Thanked in
    45 Posts

    Default

    Of course, ANOTHER AWESOME GUIDE by whirlz =D good job lucian, I love reading you guides XD

  16. #15
    Forum Adept Aikiebo's Avatar
    Join Date
    Jun 2011
    Posts
    462
    Thanks Thanks Given 
    3
    Thanks Thanks Received 
    28
    Thanked in
    25 Posts

    Default

    Thank you for this!!
    "How Wude! Mesa your humble Servant."
    "You can argue with me, but you can't aruge with the math." Foghorn Leghorn, 20th Century American Philospher

  17. #16
    Fastronaut Nightarcher's Avatar
    Join Date
    Aug 2010
    Location
    The Shire - Hobbiton
    Posts
    1,189
    Thanks Thanks Given 
    89
    Thanks Thanks Received 
    34
    Thanked in
    25 Posts

    Default

    Nice job Whirlz!

    Quick correction, Gustav drops glyph shields, not maces. Maces/wands/daggers (1h weapons) are from Snake Charmer.
    Gandalf—Level 21 Arcane Legends Sorcerer
    Redeemed—Level 12 Sorcerer twink

    Nighttrooper - Level 40 Commando [retired]
    Nightarcher - Level 60 Avian Archer [retired]

  18. #17
    Senior Member
    Join Date
    Mar 2011
    Posts
    4,596
    Thanks Thanks Given 
    9
    Thanks Thanks Received 
    638
    Thanked in
    315 Posts

    Default

    Still some confusion on that.
    While I pretty much 99% believe you on that, I wanna wait to insert that until a developer or until it's a 100% agreement.

  19. #18
    Senior Member Register's Avatar
    Join Date
    May 2011
    Location
    Somewhere, listening to music (:
    Posts
    2,559
    Thanks Thanks Given 
    84
    Thanks Thanks Received 
    25
    Thanked in
    18 Posts

    Default

    Great Guide! Sticky Pweeze! Also, does anybody know what the best level for pinks is?
    ShadowPlat OneMoreDay RegiLess & RegFree
    My Guess: 177

  20. #19
    Forum Adept Ovocotto's Avatar
    Join Date
    May 2011
    Location
    Italy
    Posts
    278
    Thanks Thanks Given 
    18
    Thanks Thanks Received 
    7
    Thanked in
    1 Post

    Default

    Nice job
    Last edited by Pandar; 01-03-2012 at 07:19 PM.

  21. #20
    Senior Member
    Join Date
    Mar 2011
    Posts
    4,596
    Thanks Thanks Given 
    9
    Thanks Thanks Received 
    638
    Thanked in
    315 Posts

    Default

    Quote Originally Posted by Register View Post
    Great Guide! Sticky Pweeze! Also, does anybody know what the best level for pinks is?
    In the guide, I said Lion's Den/Funhouse was best. Nuri's Madness is decent too.

Bookmarks

Posting Permissions

  • You may not post new threads
  • You may not post replies
  • You may not post attachments
  • You may not edit your posts
  •