


Have you been trying to figure out whether you want to be a support of damage engi? Well you don't have to chose! This hybrid build will provide you with the best of both worlds, so you can keep your group alive while you do more than heal and sit on the sidelines. In order for this build to be most effect, I suggest using a weapon that makes your damage as high as possible, as this will determine the effectiveness of your spells (damage, and healing). Basically, higher damage = higher skill base damage.
Attribute Points:
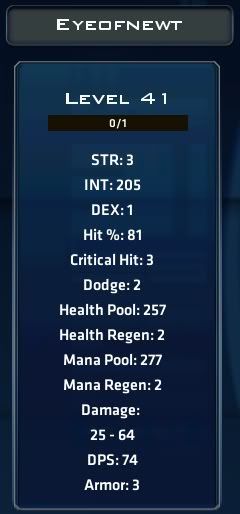
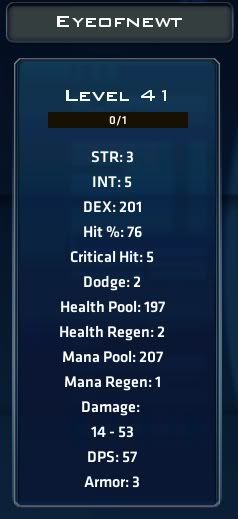
Here are a couple screenies that show you how different attributes affect engi stats. Note, attribute points affect different classes differently, this only pertains to engis:
For me, i think the best balance is about 75-80% Int, 20-25% Str. Dex isn't worth it for an engi. What you can do is go to your avitar page, hit update stats, and play around to find your own perfect balance. As long as you don't hit submit, you won't be asked to pay plat for a respec.
Shield Recommedations:
Now on to shields. I think there are very few people who would recommend using the engi gloves for anything other than chillin' in Blackstar. There are a few shields that are geared toward boosting intelligence, while others are not. Shields become available at level 26 (not including the winter festival stuff). So, here is a little shield info:
Note: all shield info currently listed is for rare shields only, no epic/legendary shields are aren included ATM.
Priority Engi Shileds -- __ -- Second Choice Engi Shilds -- __ -- "Danger, Danger Will Robinson" Engi Shields
Shields will have prefixes, which determine what attributes are boosted by them. I'm not going to list all the stats of every shield because every level shield from 26 up contains 1 of each of the following three prefixes (excluding Winter Festival shields). The level of the shield determines how much each stat is boosted.
- Limited - Int > Str, no Dex boost
- Special - Dex > Int, no Str boost
- Modified - Str > Dex, no Int boost
Level 26-30 Shields - Higher stat boosted 9, lower stat boosted 5
Level 31-35 Shileds - Higher stat boosted 11, lower stat boosted 7
Level 36-40 Shields - Haven't seen any yet......
The winter festival shields work in a similar way, with different prefixes, however only one stat is boosted. Instead of boosting a second stat, these shields offer different attribute buffs. The level 10 & 20 shields are a jackpot for PvP, so for them, I'll code them for PvP use:
- Lv 10 Glacial - 2 Str, 1% dodge, 10 health, 24 armor
- Lv 10 Frosty - 3 Int, 10 health, 15 mana, 24 armor
- Lv 10 Arctic - 2 Dex, 1% crit, 24 armor
A stat boost of 2 or 3 won't really do much for you, so I would use the other stat boosts to chose for your twinks here. Between frosty and arctic, you will need to decide what is more importan, the health or the crit. In my opinion though, the dodge is the best way to go.
- Lv 20 Glacial - 4 Str, 1Dex, 2% dodge, 20 health, 48 armor
- Lv 20 Arctic - 4 Dex, 1% hit, 1% crit, 20 health, 48 armor
- Lv 20 Frosty - 4 Int, 1% hit, 20 health, 35 mana, 48 armor
Here, you get the health bonus no matter what, and once again, 4 stat boost won't do too much, even though it is better than 2. Here I think the toss up is between glacial and arctic. Personally, i would prefer the 2% dodge, but either way you go should do more for you than the frosty will.
I'm not going to comment on the level 30 & 40 shields for PvP for a couple reason. First, there are other shields available with much higher defense (~40-60 armor = 1 point reduction in damage) and they have different stat boosts compared to the non WF shields. With the level 35 legendary gun/shield combo, you will get different set bonuses as well. There are so many different combinations of things you can do at these levels and I don't comfortable advising anyone on what is the best choice. At level 10 & 20, only WF shields are available, so the comparison can be made easily.
- Lv 30 Arctic - 7 Dex, 1% hit, 2% crit, 20 health, 72 armor
- Lv 30 Frosty - 9 Int, 1% hit, 25 health, 45 mana, 72 armor
- Lv 30 Glacial - don't have info on ATM, will edit when available.
- Lv 40 Arctic - 10 Dex, 2% hit, 2% crit, 30 health, 96 armor
- Lv 40 Frosty - 13 Int, 1% hit, 1% crit, 60 mana, 96 armor
- Lv 40 Glacial - 11 Str, 2% hit, 1% crit, 55 health, 96 armor
Skill Points & Slot Arrangement:
Slot 1
-Revive - 3
-Sonic Boom - 6
-Trnsference - 6
-Empathy - 6
Slot 2
-Wither - 6
-Leech - 6
-Pain - 1
-Decy - 6
How to Level:
Well, lets start out with when you will attain each skill
Wither - 2
Leech - 3
Empathy - 4
Revive - 6
Force Shield - 8
Suppression - 10
Protection - 12
Transference - 16
Pain - 20
Sonic Boom - 24
Decay - 28
I recommend turning auto-level off so that you don't have a point put towards the skill when you obtain it:
2 - save
3 - leech (1)
4 - empathy (1) (2)
5 - empathy (3)
6 - revive (1)
7 - wither (1)
8 - leech (2)
9 - wither (2)
10 - empathy (4)
11 - save
12 - save
13 - save
14 - save
15 - save
16 - transference (max out)
17 - empathy (5)
18 - leech (3)
19 - empathy (6)
20 - pain (1)
21 - wither (3)
22 - save
23 - save
24 - sonic boom (1)
25 - save
26 - save
27 - save
28 - decay (max out)
29 - leech (4)
30 - leech (5)
31 - wither (4)
32 - sonic boom (2)
33 - leech (6)
34 - wither (5)
35 - wither (6)
36 - sonic boom (3)
37 - sonic boom (4)
38 - sonic boom (5)
39 - sonic boom (6)
40 - revive (2)
41 - revive (3)
Feel free to play around with this, but there are some things you should always keep constant:
- transference is learned at level 16 and should be maxed out immediately
- decay is learned at level 28 and should be maxed out immediately
- leech should always get leveled higher than wither because it will heal you as well as damage the enemy
- DoTs in general are only effective if the enemy is alive (duh) so one that hit for more/tick (leech & decay) but last a shorter duration are better for weaker mobs, while ones that last longer and hit for less/tick (wither) are better for stronger mobs, mini-bosses, and bosses.
The Whys & Why Nots:
Lets start out with the why nots
-Force Shield - you will be drawing some aggro with this build, and it wont last long enough to be productive as far as mana regen is concerned. Also, revive will give you some mana regen.
-Protection - At max level, it will only provide your party with a 1-2 decrease in damage, so it's not the best use of skill points IMO.
-Suppression - I just recommend staying away from this for my build. I've seen a few engis use this skill effectively, but really only when I tank on my engi and there is no com around. I think the reason for this is that when I rush a mob, I use my AOE skills at the beginning, and if suppression is used after this and there is no com using one of the many com AOE skills, then the suppression usually last on most of the mob (in SY4/5). It's a nice way to reduce the damage I take, but I still wont add it to my build. Thanks for the few that have helped with this tho!
The Whys
-For healing, empathy (6) and transference (6) speak for themselves
-Revive (3) - really only needs one skill point until you level high enough to have extra. It will provide you and your party with mana regen, but is not stackable (thanks for unknowingly proving this in the GH Weenis). Leveling this higher increases the range by 1 meter/level, but it hasn't been necessary for me. Like I said, its helpful when you have the extra skill points, but not needed until then.
-Decay (6) - DoT + armor debuff. Nuff said.
-Pain (1) - Really only needs 1 skill point. It is most effective for it's stun and AOE effect, as it IS NOT a DOT. The AOE damage is 15-25 at every skill level, so save your points for other skills.
-Wither (6) and Leech (6) - These DoTs will do some real damage on enemies that don't die withing a few seconds (bosses, mini-bosses, and mobs from the higher stages in sloucho). Leech will also give you an extra healing boost, which is nice since you will be drawing aggro with this build.
-Sonic Boom (6) - Annoyingly long cool down, but a great aggro magnet. Make sure you have transference ready after using this though to keep your health up (reference mob strategies below).
How to Use Effectively:
-Mobs
You'll have to balance your support and damage, but it will become second nature after a little while. Empathy at the beginning is good for small/trash mobs, as it will last till they die and you will be able to use it again if need be before moving to the next mob. The tricky thing is getting your whole group in on it, which is less of a problem if there is another engi in the group. Try your best. Tanks shouldn't need the heal as you approach the mob, but make sure you heal him up before he rushes off to the next mob. A good tank will rush ahead when the mob is ALMOST dead to build up aggro on the next mob, so make sure you heal him up before he leaves. Ops may take the aggro while you approach the mob, so make sure they are included in the initial empathy. You don't necessarily need to use transference in the beginning of the mob. On the harder mobs, if you use it in the beginning, you can probably use it at the end again most of the times. On the small/trash mobs, it is best saved for the middle to give an extra healing boost to anyone who may need. Always use pain in the beginning to maximize the number of enemies you hit wit the AOE effect. Also, you will ONLY get the AOE if the enemy is alive at the end of the 3 seconds, so don't use your other damage skills right away. I also wouldn't use all your DOTs at once. Use decay and then leech to maximize the amount leech will damage/heal. When the targeted enemy dies, use wither on the next. In a good group, you can generally spam revive to keep the mana regen up on your party, but you shouldn't need much for yourself. With pure intelligence, your mana regen should be at 3. If there is more than one engi, remember that the mana regen does not stack, so don't waste the revive if another engi has used it. With sonic boom, you should be very careful about drawing aggro. If (maybe i should say when) i rush mobs in SY5 and use sonic boom, instead of waiting for a little backup first, mobs completely focus on me and after 1-2 his from them, i am dead. So, i have found it effective to wait for com to have aggro to use sonic boom. You will still draw attacks from some enemies, so be prepared to use transference almost immediately and bam, your at max health again. Don't wait to have 1/4 health to use trans though, you may not get the heal in time. If you are running without a com, i recommend staying a little closer to group. I would still stay in front to keep attacks off ops a bit, but if you rush too far ahead, you won't have much help wearing down the mob.
Alternative Mob Strategy for the hardcore
I've posted this as a response in another thread, but after playing a bit more with this build, thought it would fit here as well:
I've found that after running my build for some time now, it is also very effective at drawing aggro away from the squishies. But to do this requires muilti-targeting when in a mob. What I mean by this is not just hitting you auto attack and waiting till the enemy dies to attack another. Some may not be bothered with this, but, i often target one enemy, use a dot, target another, use dot, target another, use dot, while using trans AOE to add to my aggro. I've said it a million time that I am a passionate engi, so while my style isn't for the lazy (for lack of a better word), it holds aggro and takes full advantage of the DoT by not instantly killing the enemy after it is cast. I will say it is hard to focus on multi targeting when you start using boom, since you need to be prepared to use stims if necessary.
-Mini-Bosses with Mobs
Heal as needed as described above. You may want to spam transference for mini-bosses since they are often accompanied by a mob. On mini-bosses, you can start off with decay to increase the damage done by your party's skills and attacks. Use slot 2 from bottom up. Lather, rinse, repeat. Depending on how you group is playing, you may or may not be able to just focus on the min-boss. If your whole group focuses on the mini-boss, I suggest using slot 2 from bottom up and then using your regular attack on the mob. If your group is taking out the mob, you can focus on the mini-boss. This will be harder four you to judge when you are in PUGs.
(Edit 10/27/11): hmmm, if i find any in the next expansion i guess i can update this section
-Bosses
Heal as needed as described above. Don't use your revive for mana regen here, especially if you are the only engi. You'll want to make sure it isn't on cool down if someone dies, and you'll want your tanks and heavy hitting ops alive as soon as possible if they do happen to die. Use slot 2 from bottom up to begin with. The cool downs vary on all these skills, so I recommend spamming your pain (8 second cool down). After your first round of slot 2, it may be beneficial to hold off on leach (15 second cool down) until decay (20 second cool down) is ready. However, it is easiest to just spam slot 2 as they become available. Switching between slots to heal may become a little tedious, but nobody said being a good engi was easy.
So that's how I engi. Not to say that any other builds I have seen posted are bad, but they just don't work for me. I loved dual speccing in PL because it was a way to make the game more interesting, challenging, and overall, more fun. Dual speccing doesn't really work the same way in SL, so by not choosing between support and damage, this is my version of an engi "dual spec." Feel free to post any suggestions. I welcome any constructive criticism and feedback. And feel free to send me a tell if you find me in game, I'd be happy to help any way I can.
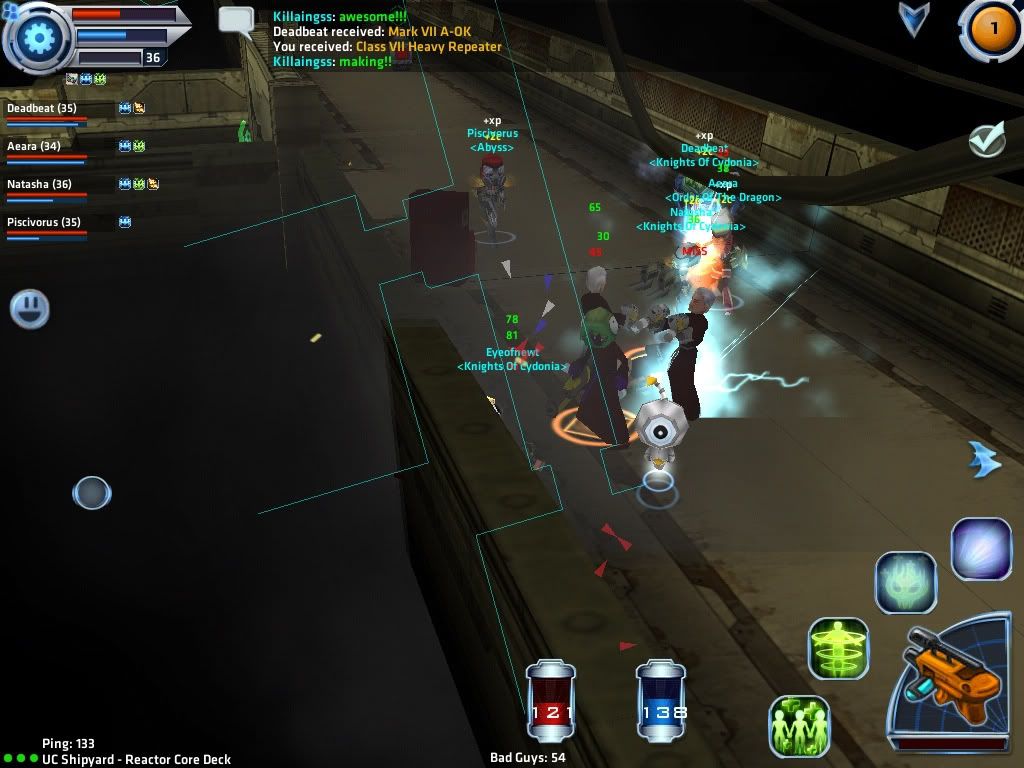
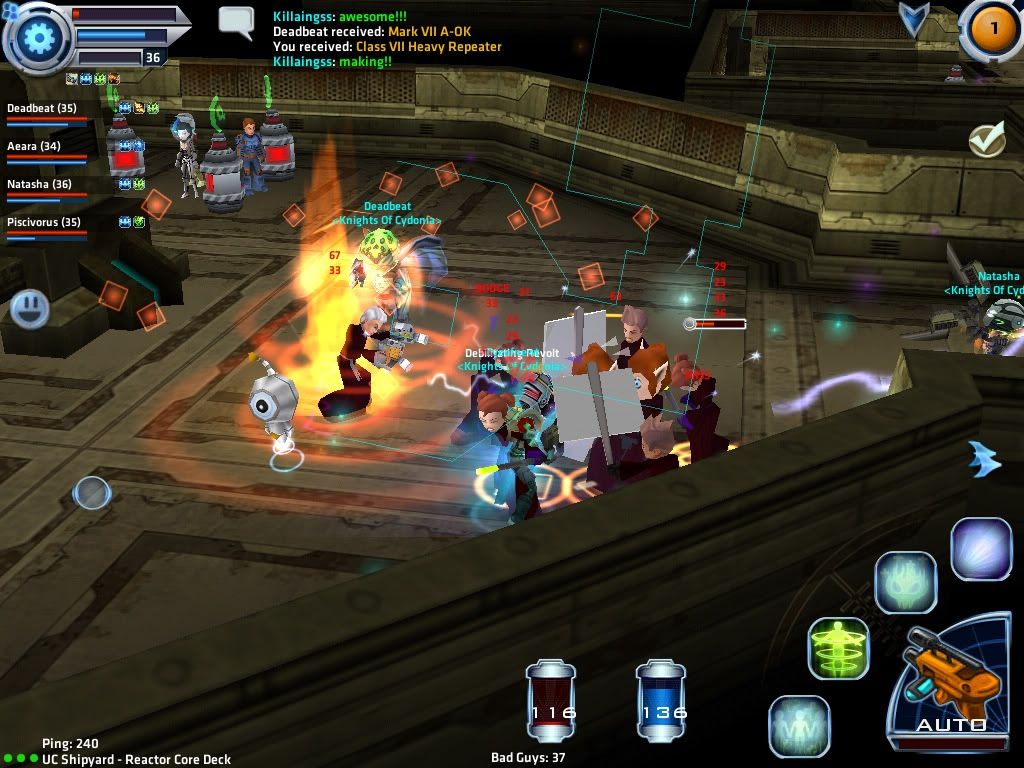
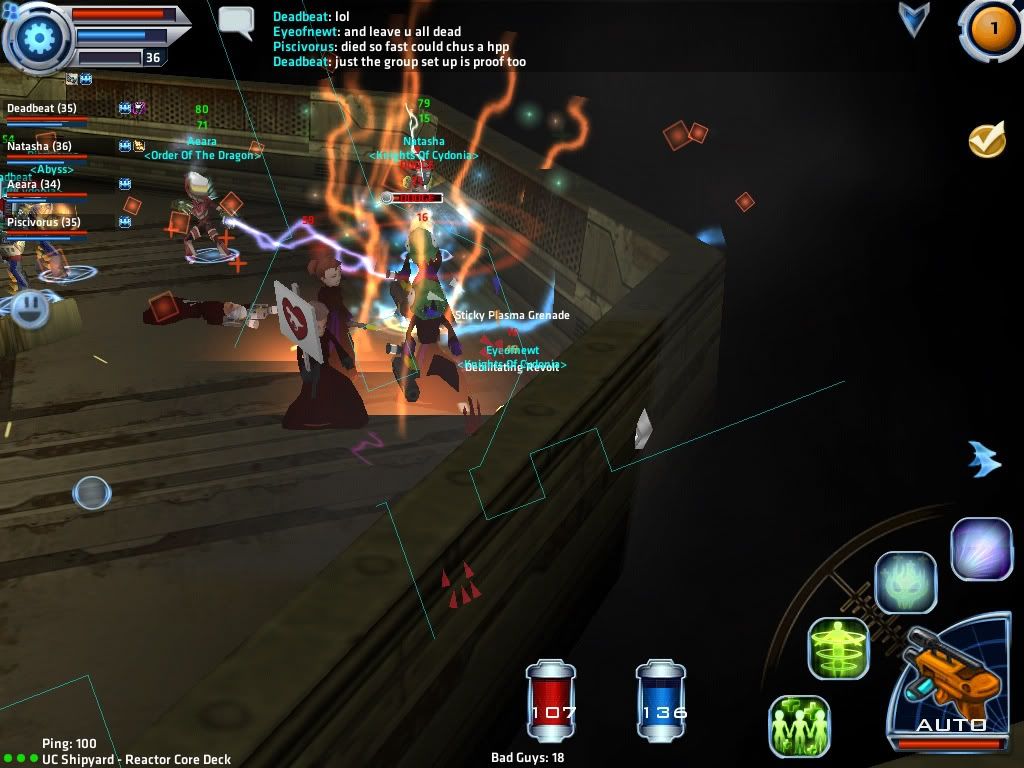
I want to thank Caveman and Firoth for helping me in sloucho with my TANKIN ENGI test, but these new screenshots work a lot better to back up my statements that this build is perfect for tanking. So, first let me say thanks to everyone that actually stayed in this group with me for over an hour without a commando on SY5 farming! You guys all rocked and I was pleasantly surprised at how smoothly we took care of the boss.
So i have stated above about my strategy for mobs. I wasn't using my "Alternative Mob Strategy for the Hardcore" here, just the normal mob strategy using sonic boom followed by transference whenever the cool down was over. I did have to use a bunch of sims, probably close to 15 or so a run, and trying to multi target my DOTs was just too hard. I can honestly say that you do not want to use sonic boom as you rush a mob without following it immediately with transference because you will die. So, as any good tank should, you are going to want to leave the group behind when the last enemy from a mob is almost dead so you can reach the next mob first and get aggro. It was nice having another engi for healing also, because when i'm trying to tank, it is hard to keep empathy on everyone when i am trying to be the first one in a big mob. I did my best to stay away from the rest of the group so you could tell if i was being targeted or not. While i couldn't keep every enemy on me, most stayed targeting me. So here are the screenshots:
2 out of 3 on me here
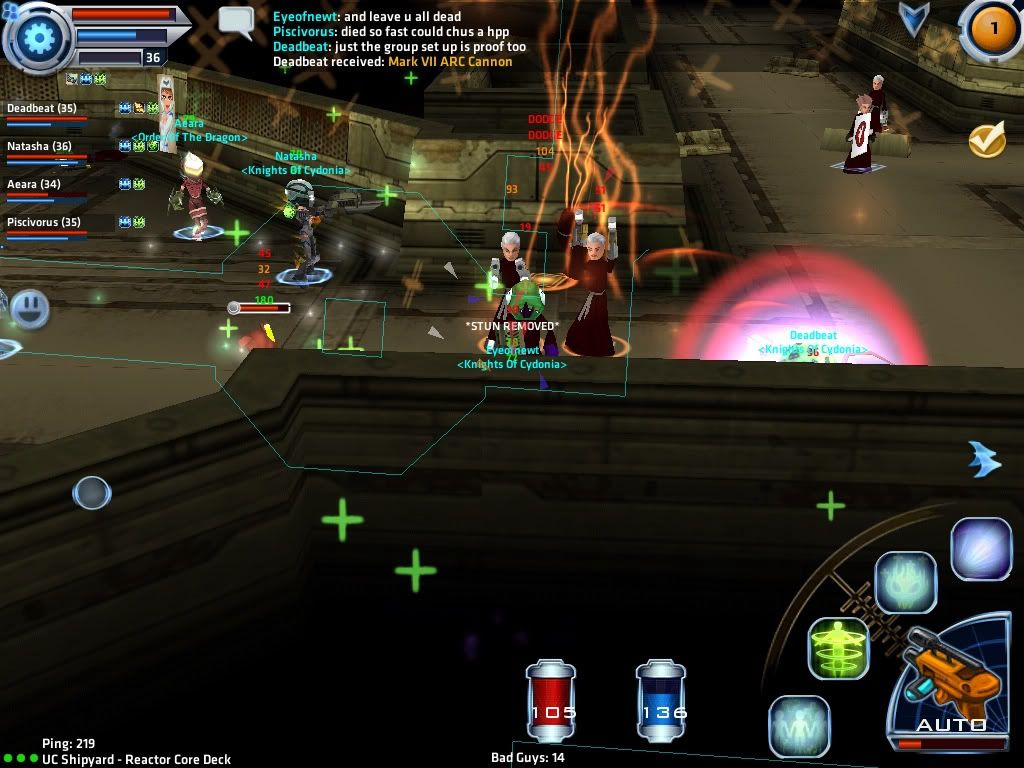
So i shouldn't have tried to take a pic here. On apple devices, the screen flashes and you can't really tap the screen to use skiils or pots for a second or two after, so right after this pic, i died. By the time i used a plat to rez myself, 2 others in the group went down. Sorry!!
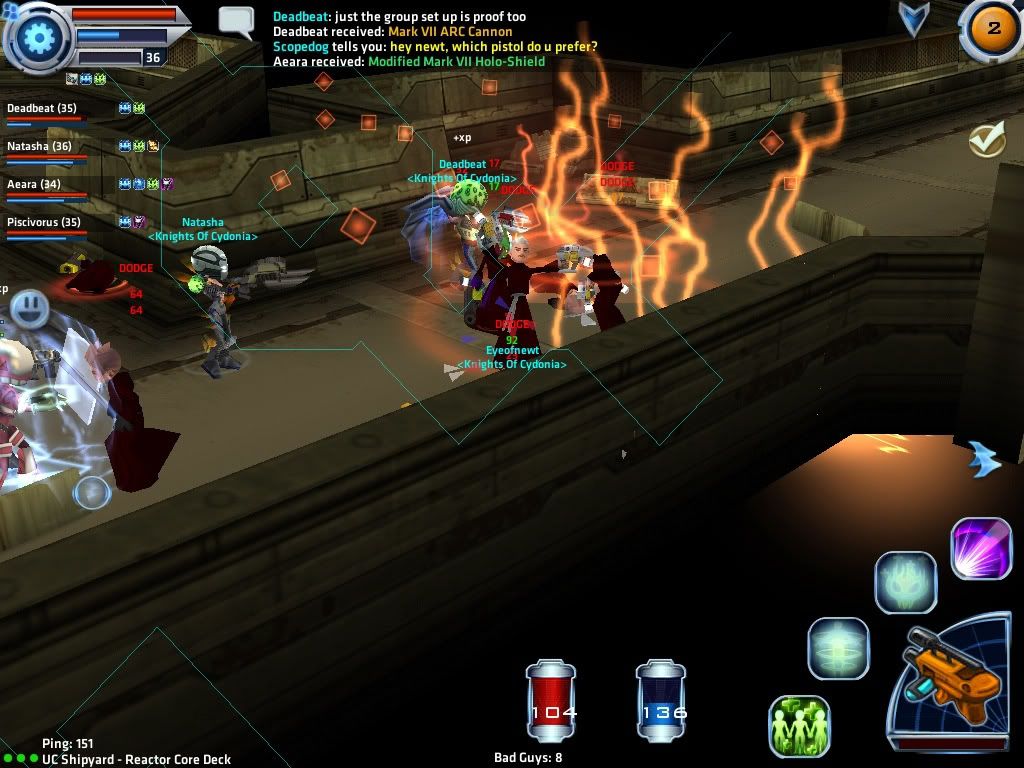
Think they are all on me here
This is the same mob from screenshots 2 and 3. I think they are all still on me here too. maybe one isn't, little hard to tell.
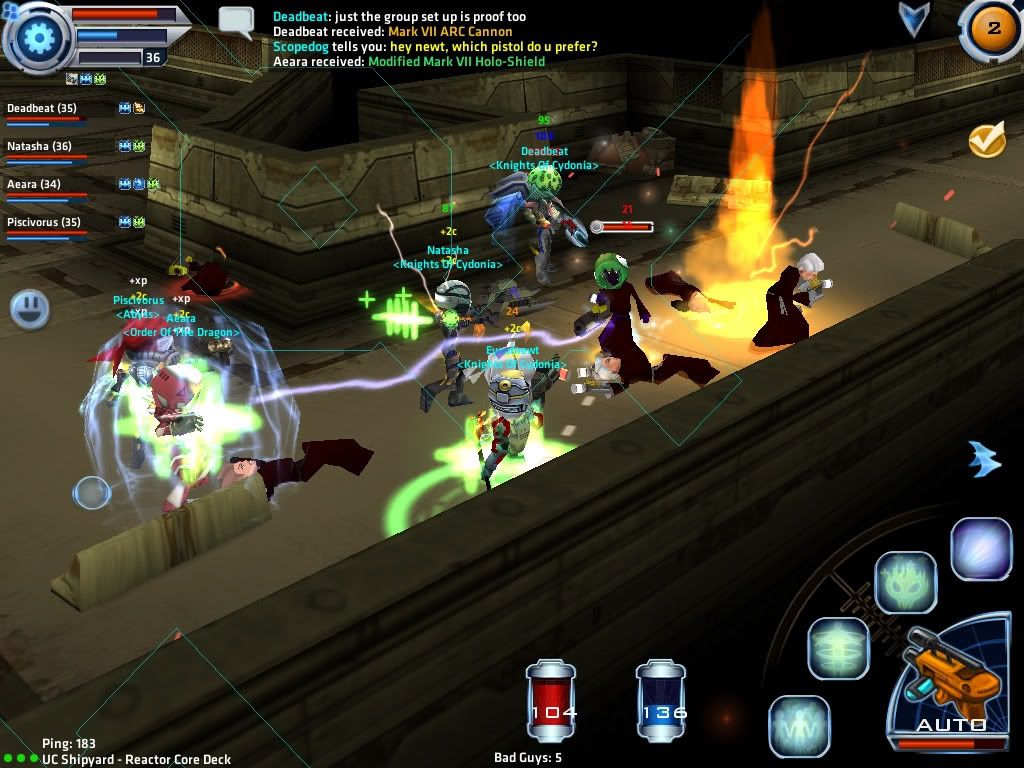
Little mob before the last mob before the boss, focusing on me.
Looks like i only have half the mob on me here :'-(
So that guy stayed on me the whole time at least
So if you aren't convinced, ask the people that stayed running with me for an hour. They were all great! Thanks again for staying with me guys. Also, i asked a couple of the ops from my guild afterwards how many stims they used, one said about 5 a run and the other one i think was about 5-10 a run (said he used 70 the whole time we were running, i was TANKIN ENGI for about half that time, so i'm doing some loose estimation here).
(Edit 11/3/11): I was just informed by deadbeat that he used 70 mana stims total, and only 2 health stims total!!
Hope you like build!


Bookmarks