


Hi guys!
This is a guide to the last level of the Shipyard campaign, Reactor Core Deck (or "RCD"). The level is the longest and most tedious level of the campaign and I made this short guide just to fill all you guys in on a few tips that will make your RCD runs a bit faster. I picked up these tips from random players while on my way from level 29 to level 35 where I solely did only RCD runs (I like to take advantage of the higher threat level, ie. higher drop rate). So credit is due to those players who told me these tips (sorry can't remember their names =S).
This guide contains 3 short sections:
- The Mobs!
- The Hostages!
- The Mysterious Figure!
The Mobs!
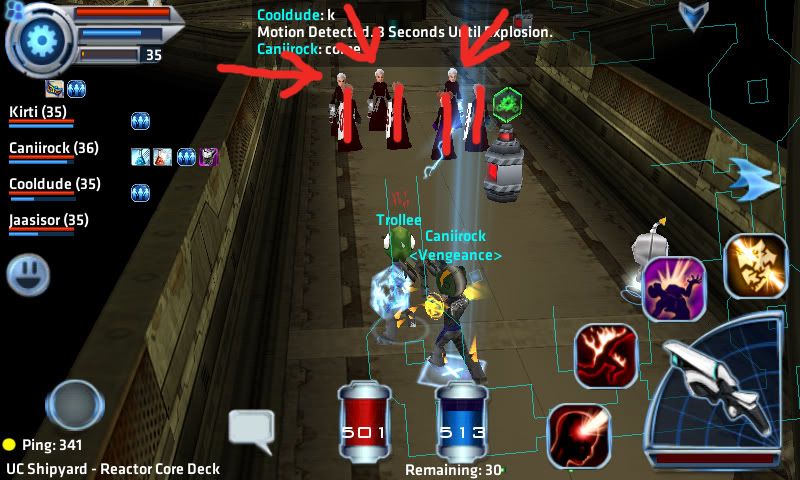
There are 98 mobs in RCD. The mobs in RCD are a lot tougher than a the other Shipyard instances. They have significantly more health and higher defense and hence, the runs at RCD are a lot slower than your standard xp runs at Shipyard level 1-3. However, there is an order to kill the different types of mobs. Use targetting to select the right enemy first so to kill the mobs in the following order:
- 1. Engineers (Glow wand, Grey hair)
- 2. Operatives (Dual pistols- some can also heal I think)
- 3. Commandos (Heavy weapons, Vular head- not sure if this is permanent or not because of Halloween)
In this way the mobs don't receive healing from their Engineers which would prolong their existence. Then removing the Ops decreases the damage that you and your party receives. Leaving you with the Commandos which take the longest to kill, however they are a lot safer with Ops and Engineers removed first. If this is done correctly by the group the the time it takes to reach is boss is drastically reduced. Below is a screenshot of the Engineers/Operatives that you want to kill first!
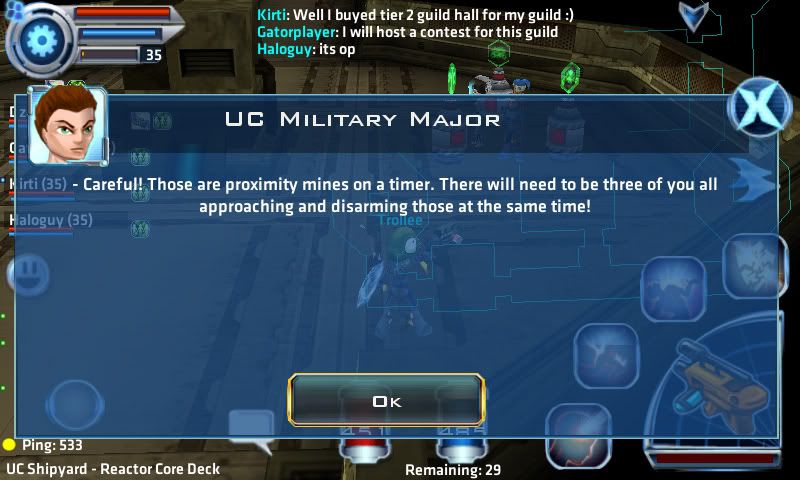
The Hostages!
The UC Military General is deceiving! Upon approaching the hostages, he tells you this:
But this is entirely false. You do not need 3 people to rescue the hostages, it can be done with only 1 person. To do so, simply deactivate the mines one by one. However, you must be quick! Run in and deactivate the first mine just after the red flash, and as soon as the mine has deactivated, run away as fast as possible! Even though it will detect you and say "Proximity mine activated, detonation in 3 seconds" it will only blow up (and kill the hostages) if you are still within range (the mines and the UC Military General lie to you O.o). So if you repeat this process on the three mines then the hostages can easily be saved by only one person. =]
The Mysterious Figure!
The Mysterious Figure is the hardest boss of the Shipyard campaign. He is often underestimated by new players to the level, as there is a unique strategy that must be used to defeat him. I have joined a lot of PUG games that have resulted in full party wipes due to the fact that none of players knew what to do in order to defeat this boss. All in all, he is the hardest boss for a reason- he drops phat lewt!
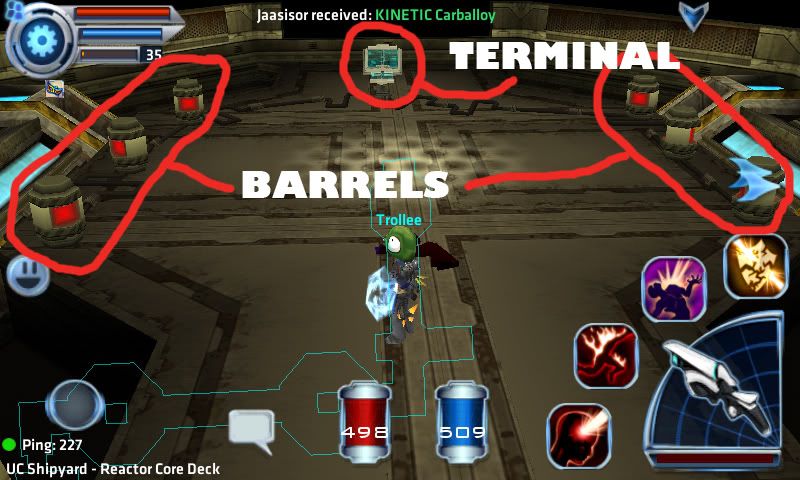
Now, here is the layout of the Reactor Core Room:
Once you step into the center of the room a few mobs will spawn (I will refer to these guys as The Mysterious Figure's minions). Kill them, then shortly after the Mysterious Figure himself will spawn. Ignore him for now! He has too much health and in order to protect the terminal it is a lot easier to kill off all the minions first and then concentrate on the boss last.
Now, in order to protect the terminal each class must play their respective role. The Mysterious Figure and his minions will repetitively walk over to the terminal and attempt to hack into it (takes about 5 secs for them to successfully hack it). Your role is to stop them doing this! Each class has their respective skill that is effective in preventing the terminal in being hacked.
- If you are an OPERATIVE, use LURCH and PSYCHIC LASH to repel the enemies and boss away from the terminal.
- If you are an COMMANDO, use SINGULARITY and GRAVITY WELL to fling the enemies away the terminal. However, These skills are not to be used at the same time! Try and spread skills use out or you will find that the team will not have the use of the skill when at that critical moment where the terminal needs protecting. Additionally, it is more efficient if the commando pulls the mobs to the two back corners, once the mobs start moving towards the terminal, use Gravity Well to pull them back. If that doesn't work, run in front of them and push them back to the wall using Singularity.
- If you are an ENGINEER, DO NOT use SUPPRESSION because it roots enemies and cancels out the effect of lurch and singularity. So, just SPAM HEAL. However, it is sometimes necessary to use Suppression if you have an inattentive op or commando, so keep it in your pocket just in case.
The 3 barrels on either side (6 in total) represent the amount of chances that your team has to save the reactor. Each time the Mysterious Figure or one of his minions successfully hacks the terminal one of the barrels blows up. Henceforth, once the last barrel explodes, the reactor core blows up, and everyone dies. =]
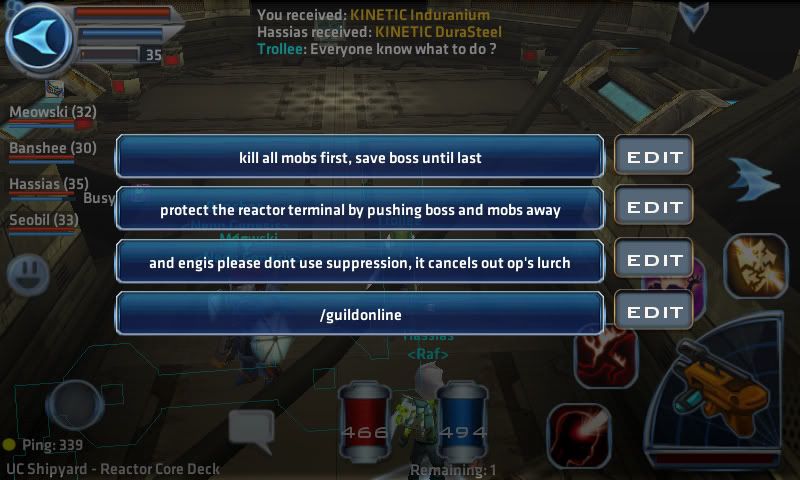
So, in summary, these are the 3 core strategies to defeat The Mysterious Figure:
- Clear mobs first, then boss.
- Push enemies away from terminal when they attempt to hack it.
- Ops use Lurch, Coms use Singularity, Engi's use any skill but Suppression
When in a PUG game at RCD I often ask the players in my group if they have fought this boss before. If they reply with "no", then I go through my quick chat instructions:
Thus concludes this short guide!
Thank you for reading, any feedback is greatly appreciated!
- Trollee
Thanks to the following Forumers for the feedback that helped improve this guide:
- BodMaster
- Zaltiar
- FluffNStuff
- krazii


Bookmarks